
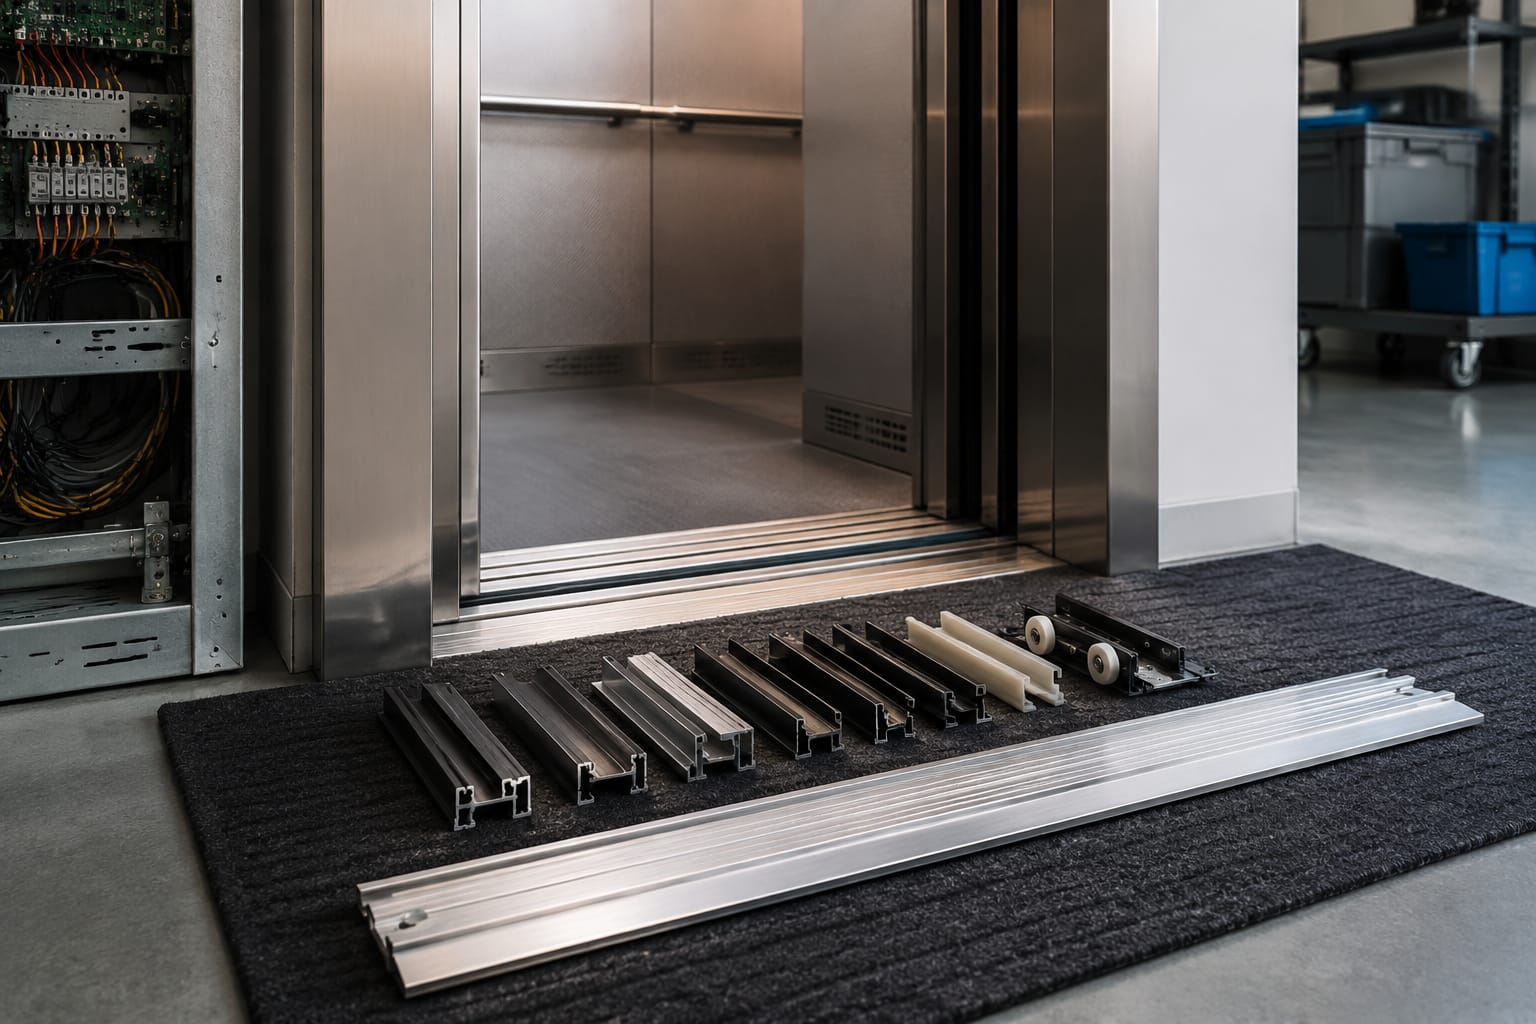
An elevator door sill is the grooved threshold at the bottom of a car or landing entrance. Its grooves locate the door guides and keep the panels travelling on a controlled path. When the sill is blocked, worn or incorrectly matched to the door system, doors can drag, rattle, misalign or fail to close reliably.
For maintenance teams and parts buyers, a sill replacement is not simply a matter of matching its visible width. The groove profile, guide compatibility, fixing centres, threshold height and relationship with the door panels all need checking before an order is placed.
What an elevator door sill does
An elevator door sill provides the lower guide track for horizontal sliding doors. Door panels generally use bottom guide shoes, inserts or gibs that run in the sill grooves while the hanger and rollers carry the panel load above. This arrangement prevents the bottom of each panel from swinging in or out during travel.
A correctly functioning sill helps the door system to:
- Maintain the intended panel path across the opening.
- Keep panel gaps and overlap consistent.
- Reduce rubbing between adjacent panels, jambs and returns.
- Support accurate engagement between car and landing doors.
- Prevent loose debris from entering the shaft through the entrance threshold.
- Provide a stable, flush transition for passengers, trolleys and cleaning equipment.
The sill does not normally carry the full weight of the door panel. That remains the job of the upper hanger track and rollers. However, a damaged sill can still place side loads on the door system. A door that is forced to run through a bent groove or damaged guide may put additional strain on hangers, rollers, linkages and the operator.
At a landing, the sill also forms part of the entrance finish. Its surface condition matters for both door performance and safe passage across the threshold. At the car entrance, it moves with the lift car and must remain properly positioned relative to the landing sill as the car stops level with each floor.
Car sills versus landing sills
Car and landing sills serve similar guiding functions, but they operate in different locations and may have different profiles, lengths and fixing arrangements. Treating them as interchangeable is a common sourcing mistake.
| Feature | Car sill | Landing sill |
|---|---|---|
| Position | Installed at the lift car doorway | Installed at a fixed floor entrance |
| Movement | Travels with the lift car | Remains fixed at each landing |
| Primary relationship | Guides car door panels and must align with landing doors at a stop | Guides landing door panels and must align with car doors at a stop |
| Length | Based on the car entrance width | Based on the individual landing entrance width |
| Installation concern | Car front structure, levelling and moving-cable clearances | Floor finish, entrance frame, building structure and shaft edge |
| Replacement check | Car-door panel guides and operator setup | Landing-door guides, sill support and local floor condition |
The car sill must be positioned so the car doors operate freely at every landing within the expected levelling tolerance of the installation. A sill that is sound but sits out of position can contribute to poor car-to-landing door engagement.
Landing sills are exposed to site traffic, wet footwear, dust and debris at a single entrance. Conditions may vary substantially from one floor to another. For example, a landing near a loading area may need more frequent cleaning and inspection than a lightly used office floor.
When measuring an existing sill, identify the location first. Record whether it is a car or landing sill and whether it belongs to a centre-opening, side-opening, two-panel, telescopic or multi-panel door arrangement. The number and position of grooves are often essential clues, but they are not enough on their own to confirm compatibility.
Common sill materials and profiles
Aluminium alloy is widely used for elevator door sills because it is relatively light, corrosion resistant and can be extruded into detailed groove profiles. Depending on the application and manufacturer, sills may also be supplied in stainless steel or other engineered materials.
Material selection should reflect the entrance environment, traffic level and the existing door design. It should not be based on appearance alone.
Aluminium alloy sills
Aluminium alloy sills are common in commercial lift installations. Their extrusion process supports precise grooves, ridges and fixing channels. The surface can be finished to suit the entrance design, but the critical issue is the accuracy and durability of the guide grooves.
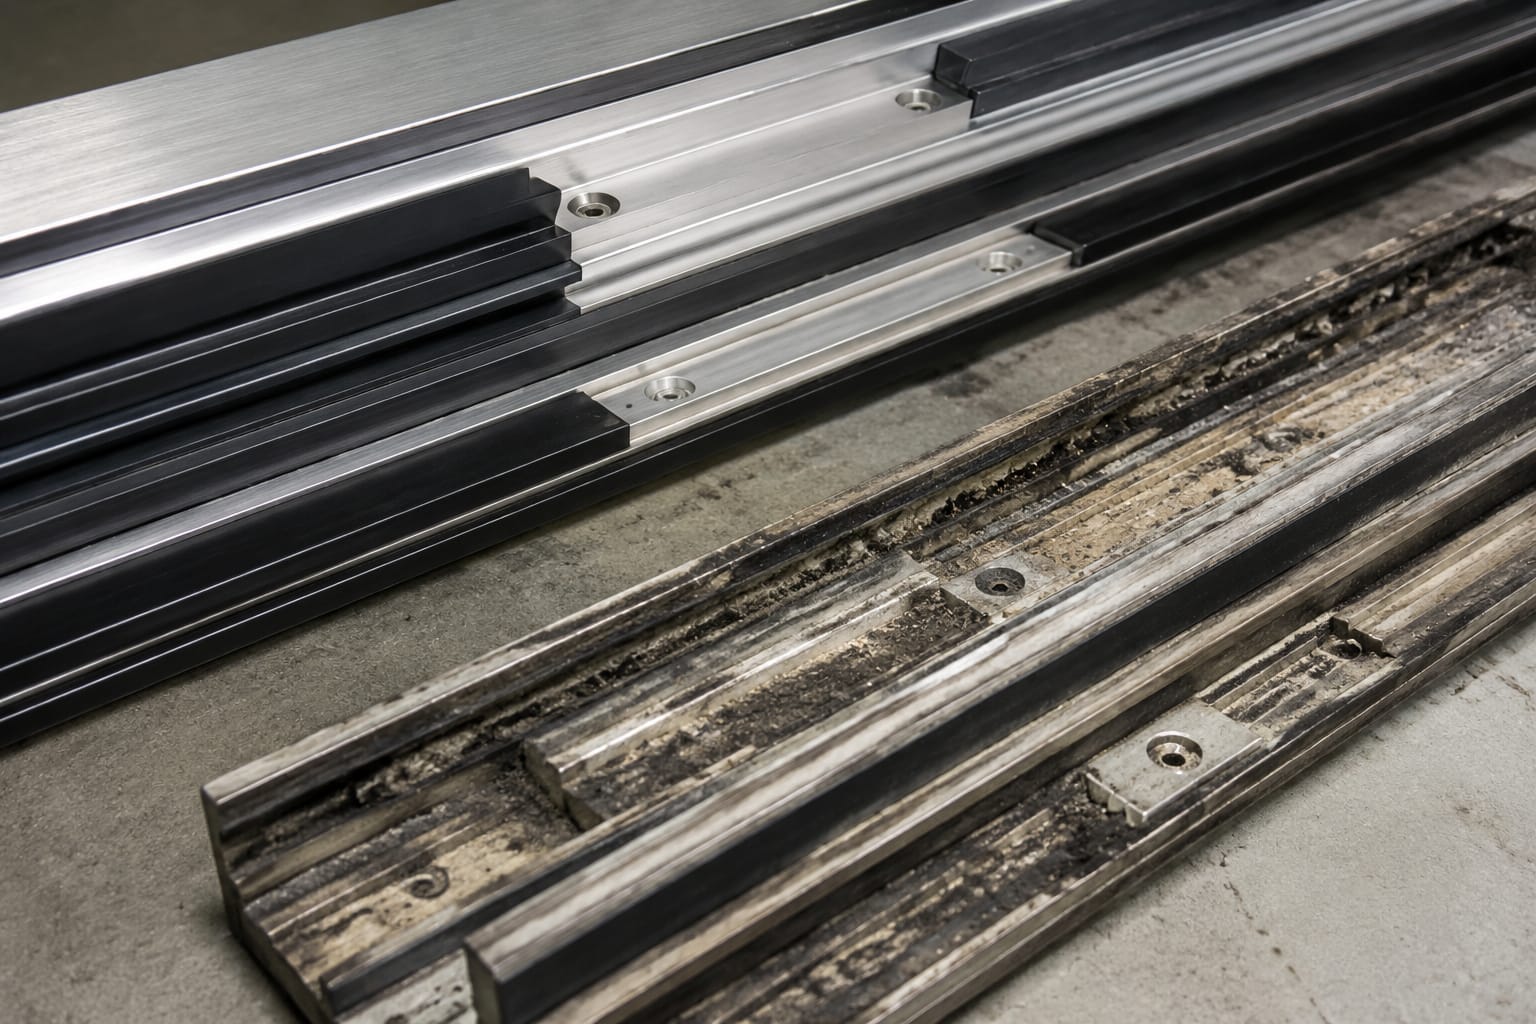
An aluminium sill can be damaged by impact from hard-wheeled equipment, aggressive scraping tools or repeated debris compaction in the grooves. It may also wear where a damaged guide shoe rubs repeatedly against one edge.
For a profile-specific option, compare the dimensions and groove arrangement of an [aluminium alloy 60 mm F-type elevator door sill](/products/aluminum-alloy-door-sill-60mm-f-type-elevator-parts/) against the existing component. The product name or nominal dimension alone is not sufficient confirmation of fitment.
Stainless steel sills
Stainless steel may be specified where a more robust visible finish or enhanced resistance to staining is required. Its suitability still depends on the profile, panel guide design, support method and finish requirements of the existing entrance.
Do not assume stainless steel is automatically an upgrade for every installation. A different material may alter the sill thickness, groove geometry, fixing method or interface with surrounding floor finishes. The supplied profile must match the door system.
Profiles and groove arrangements
Sill profiles vary by door manufacturer, model, opening arrangement and panel count. Common differences include:
- Number of grooves.
- Groove width and depth.
- Groove spacing and centre lines.
- Ridge shape between grooves.
- Overall sill width and height.
- Nose or front-edge form.
- Drainage or debris-relief features where applicable.
- Fixing channels, countersinks or drilled holes.
A guide shoe must move freely in the correct groove with controlled clearance. A groove that is too narrow can bind; one that is too wide may allow excessive panel movement. Even a sill with the same overall width can be incompatible if its groove centres differ.
When the original part number is available, use it as a starting point, then verify it against the physical sill and door arrangement. Where no part number is visible, a dimensioned sketch, clear end-profile photograph and measured fixing layout are more useful than a general photograph of the entrance.
Signs of wear, damage and obstruction
Door sill problems often present as door faults rather than obvious threshold damage. A routine inspection should include the full sill length, each groove and the condition of the lower guides.
Typical signs include:
- Grit, stones, packaging fragments, screws or compacted dirt in the grooves.
- Door panels scraping, clicking or dragging during opening or closing.
- A panel that rocks at its bottom edge.
- Uneven gaps between panels or between a panel and the jamb.
- Bright polished wear marks, burrs or sharp edges within a groove.
- Cracked, dented, bent or loose sill sections.
- Corrosion, contamination or staining that prevents smooth guide movement.
- Missing, worn or broken guide shoes, inserts or gibs.
- Repeated door reversal, incomplete closure or nuisance door faults.
- Local damage at high-traffic points, especially near the centre of an opening.
Debris is one of the most frequent and correctable causes of poor sill operation. Small objects can lodge below the guide shoe, forcing it upward or sideways. This changes the panel path and may cause intermittent rubbing that is difficult to reproduce once the object moves.
Wear needs a different response from ordinary cleaning. A shallow mark that does not affect guide movement may be monitored, while a groove with deformation, raised material or enlarged clearance may need repair or sill replacement. Avoid grinding or filing a sill profile without assessing the required guide clearance. Removing material can worsen the fit and create sharp edges.
A door issue should never be attributed to the sill without checking the complete system. Loose rollers, worn hanger components, an incorrectly adjusted operator or distorted panels can create similar symptoms.
Cleaning and inspection practices
Cleaning elevator door sills should be a planned maintenance task, with the method matched to the equipment, site conditions and authorised safe-working procedure. Door equipment must be isolated or placed in an approved maintenance condition before hands or tools are introduced into moving-door areas.
A practical inspection routine is:
- Open the entrance using the approved maintenance procedure and secure the door condition as required.
- Remove loose debris with a vacuum, brush or suitable non-damaging tool.
- Inspect each groove along its full length, including the ends where debris can accumulate.
- Check for embedded objects, burrs, cracks, dents and areas of abnormal wear.
- Inspect bottom guides and confirm they are present, secure and appropriately worn.
- Clean only with products compatible with the sill material and nearby finishes.
- Restore the equipment to service and observe several complete door cycles.
Avoid forcing metal picks, screwdrivers or other hard tools through the grooves. They can score softer materials, damage inserts and conceal the original source of a fault. Avoid leaving liquid, lubricant or cleaning residue inside the sill. These can collect dirt and may transfer contamination to guides.
Inspection frequency should reflect the entrance environment. Public-facing lifts, hospitals, retail premises, industrial sites and buildings exposed to dust or wheeled traffic may require more regular attention than a low-traffic office installation. The relevant maintenance plan, risk assessment and manufacturer instructions should govern the final interval.
Record recurring debris types or repeated damage at a particular floor. This can identify an underlying building-use issue, such as unsuitable cleaning methods, damaged floor finishes or frequent trolley impacts. Replacing a sill without addressing the cause may only postpone the next failure.
Measure profile, width and fixing points
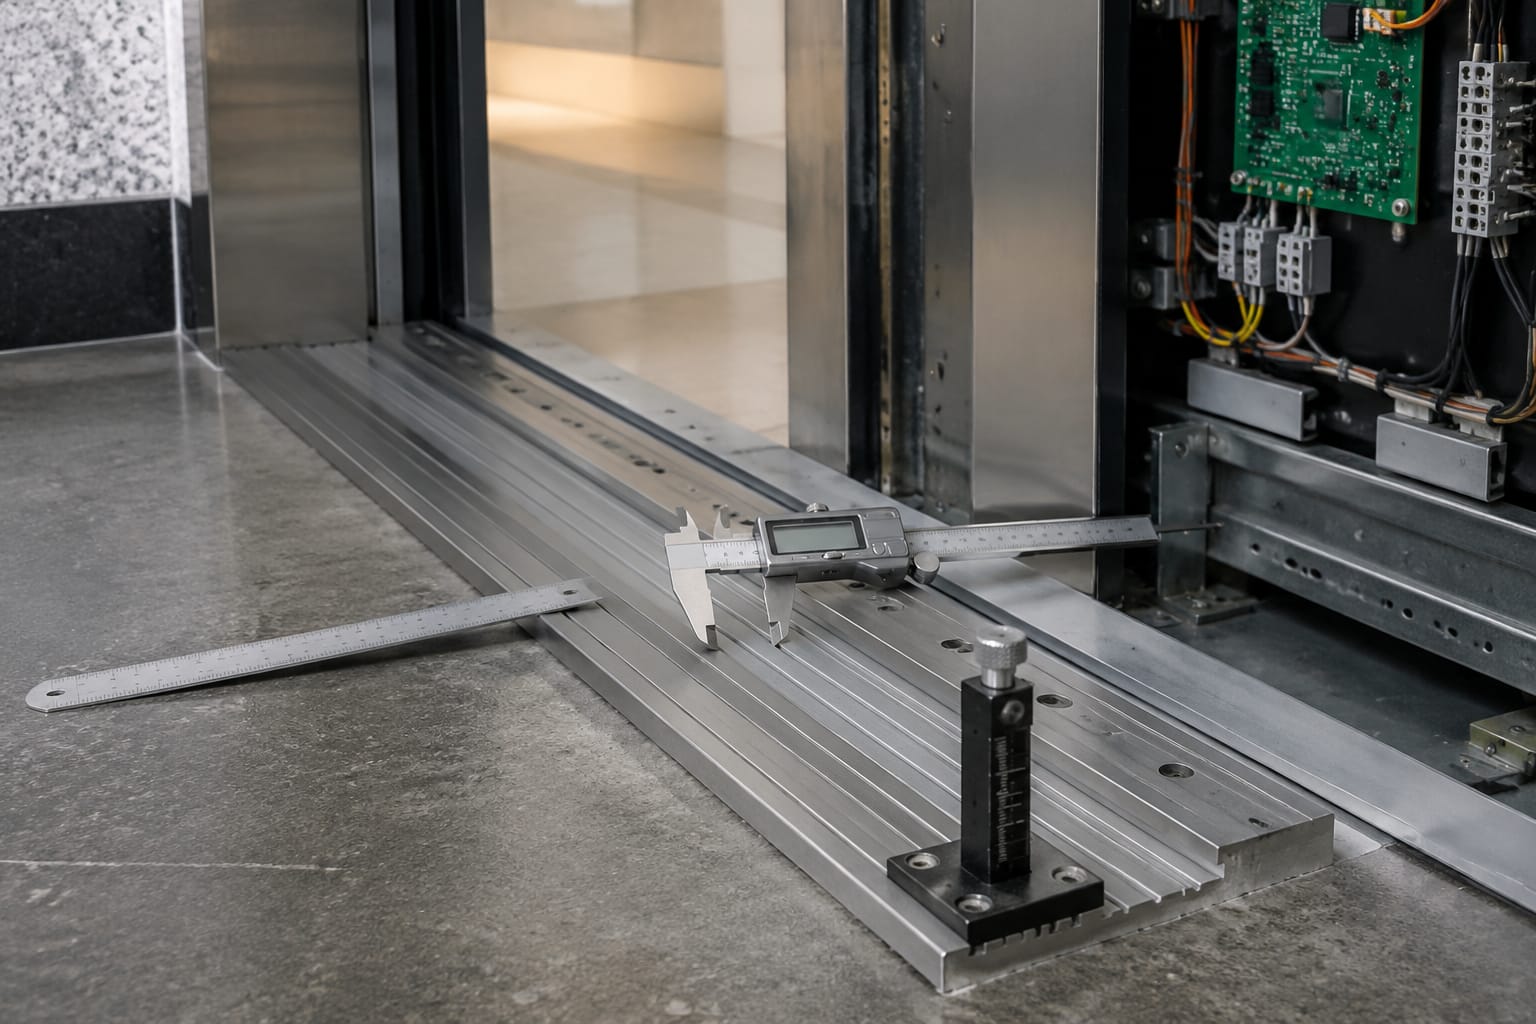
Before replacing an elevator door sill, capture enough data to establish mechanical compatibility. Measurements taken from the top surface alone are incomplete; the end profile and the relationship between grooves are usually decisive.
Use a steel rule, vernier calliper where practical, straightedge and clear photographs. Measure in millimetres and note whether measurements are nominal or taken from a worn component.
Essential measurements
Record the following:
| Measurement | Why it matters |
|---|---|
| Overall length | Must suit the clear entrance and sill termination arrangement |
| Overall width | Determines fit with the entrance frame, floor finish or car front |
| Overall height | Affects threshold level and support interface |
| Number of grooves | Must correspond with the door guide layout |
| Groove width and depth | Determines guide fit and available running clearance |
| Groove centre-to-centre spacing | Sets the path of each door panel |
| Ridge width and profile | Affects panel separation and guide positioning |
| Front nose and rear edge shape | Must suit the surrounding structure and finish |
| Fixing-hole diameter and centres | Determines whether existing supports and fasteners can be used |
| Countersink or slot details | Important for flush installation and adjustment |
| End cuts, notches and cut-outs | May be needed for jambs, returns, cover plates or wiring routes |
Take measurements at more than one point if the old sill appears bent or worn. If its grooves are distorted, do not use the damaged area as the only reference. Compare less-worn sections and, where possible, the equivalent sill at another identical entrance.
Information to send with an enquiry or purchase request
A good sourcing pack reduces the chance of receiving an unsuitable part. Include:
- Original part number, door manufacturer and model where known.
- Whether the sill is for the car or a landing.
- Door opening type and number of panels.
- Overall dimensions and groove measurements.
- Fixing layout with distances measured from one consistent datum.
- Photographs of the top face, end profile, underside and installed entrance.
- Details of any cut-outs, joins, end caps or special surface finish.
- The reason for replacement, such as impact damage, groove wear or refurbishment.
Do not order only by a description such as “three-groove aluminium sill”. Many profiles can fit that general description while having different groove spacing or fixing arrangements.
Where a sill needs cutting to length, confirm whether cutting is permitted, how end finishes will be protected, and whether the profile can be cut without affecting fixing positions or critical end geometry. Field alterations should be assessed by competent personnel because they can affect both the sill installation and entrance clearances.
Related door-panel alignment checks
A new sill cannot correct faults caused elsewhere in the door system. Before removing an existing sill, inspect how the panel runs relative to the hanger track, guides and adjacent panels. This helps distinguish a worn threshold from an adjustment or component problem.
Check the following with the doors moving under controlled conditions:
- Hanger rollers for wear, flat spots, looseness and correct tracking.
- Door panels for damage, bowing, loose skins or displaced reinforcement.
- Bottom guide shoes or gibs for wear, breakage and secure mounting.
- Panel clearance above the sill and lateral play at the bottom edge.
- Alignment of meeting edges, overlaps and jamb clearances.
- Door operator linkage, vane and clutch engagement where relevant.
- Door closing force, reversal behaviour and final closed position.
- Car-to-landing door engagement at the affected landing.
If upper hanger parts are worn, the panel can drop or tilt and force the lower guide against the sill. In that situation, replacing only the sill may result in renewed damage. For systems using this component style, inspect compatible [car-door hanging panel wheels](/products/car-door-hanging-panel-1000-58-door-hanging-wheels-lift-accessories-elevator-spare-parts/) or [door hanging panel wheel assemblies](/products/door-hanging-panel-1000-58-door-hanging-wheels-lift-accessories-elevator-spare-parts/) against the installed hardware and manufacturer requirements.
The required clearances and adjustment methods vary between door systems. Do not use a generic clearance value as a substitute for the equipment documentation. The aim is smooth, stable movement without rubbing, excessive lateral movement or interference through the full door cycle.
Replacement and final door testing
Sill replacement affects a safety-relevant door assembly and should be completed by competent elevator personnel using the applicable site procedures and manufacturer information. Confirm the new sill against the measured profile before removing the old one, particularly where returning an altered or cut part would be difficult.
A controlled replacement process generally includes:
- Isolate the lift and establish safe access in accordance with the work method.
- Document the existing sill position, panel guide locations and fixing arrangement.
- Remove the old sill without damaging nearby floor finishes, car-front structure or door equipment.
- Clean and inspect the support surface for distortion, cracking, loose fixings or water ingress.
- Dry-fit the replacement sill and verify its length, profile, groove alignment and end clearances.
- Install it level, secure and flush with the intended surrounding surfaces.
- Refit or renew guides and related components where their condition requires it.
- Adjust door panels only in line with the door manufacturer's procedures.
- Complete functional and safety testing before returning the lift to normal operation.
Final testing should cover several opening and closing cycles at normal operating speed. Observe smooth travel from fully open to fully closed, including the first and last part of movement where guide and clutch problems can be most noticeable.
Verify that:
- Panels stay correctly located in their sill grooves.
- No guide binds, skips or rides over a ridge.
- Panels do not scrape on the sill, jambs or neighbouring panels.
- The sill is secure and its fixings are properly seated.
- Landing and car doors engage correctly at each affected floor.
- Door protection, reopening and closed-position functions operate as intended.
- Threshold transitions are flush and free from new trip or snag points.
A persistent fault after replacement should be investigated as a wider door-system issue rather than corrected by further random adjustment. Recheck hanger wear, panel geometry, guide fitment, operator settings and the car-to-landing interface.
For a replacement enquiry, prepare the sill profile measurements, fixing-centre sketch, door arrangement and photographs of the installed component. Kelevator supplies multi-brand elevator spare parts for B2B buyers, so providing this identification information supports a more accurate compatibility assessment.